¶ Creating an Account
Celestial Frontier currently integrates it's account management with Twitch. To create a permanent account, you must have a Twitch account to sign into. Signing into Celestial Frontier using your twitch account will allow you to create players and access the game from any browser or device.
Guest accounts can be used to access the game if you do not wish to log in with a Twitch account. When using a guest account, your account identification is stored within your browser's local storage. You will not be able to access your account from other devices. If your browser's cache or local storage is cleared, your account will no longer be accessible. It is recommended to use the Guest account to get started.
On successful sign in, you will be presented with your account management screen where you can access any players that you have created.

¶ Creating a Player
Accounts can have any number of players active within them. Players exist within the game and have a wallet, assets, ships, facilities, and so on. When creating a player, pick a unique name that describes you or your corporate entity that you wish to become.

¶ Your Empire Screen
To get started, click on the My Empire link on the game navigation bar. Blue buttons within Celestial Frontier are almost always interactive buttons or links. Also displayed on your navigation bar is your current Balance of Credits (denoted by the ⚛ symbol), a link to the Universe Map, and the current time of the universe. Universe time is displayed as years:weeks:days hours:minutes:seconds since the start of the universe.
¶ Assets
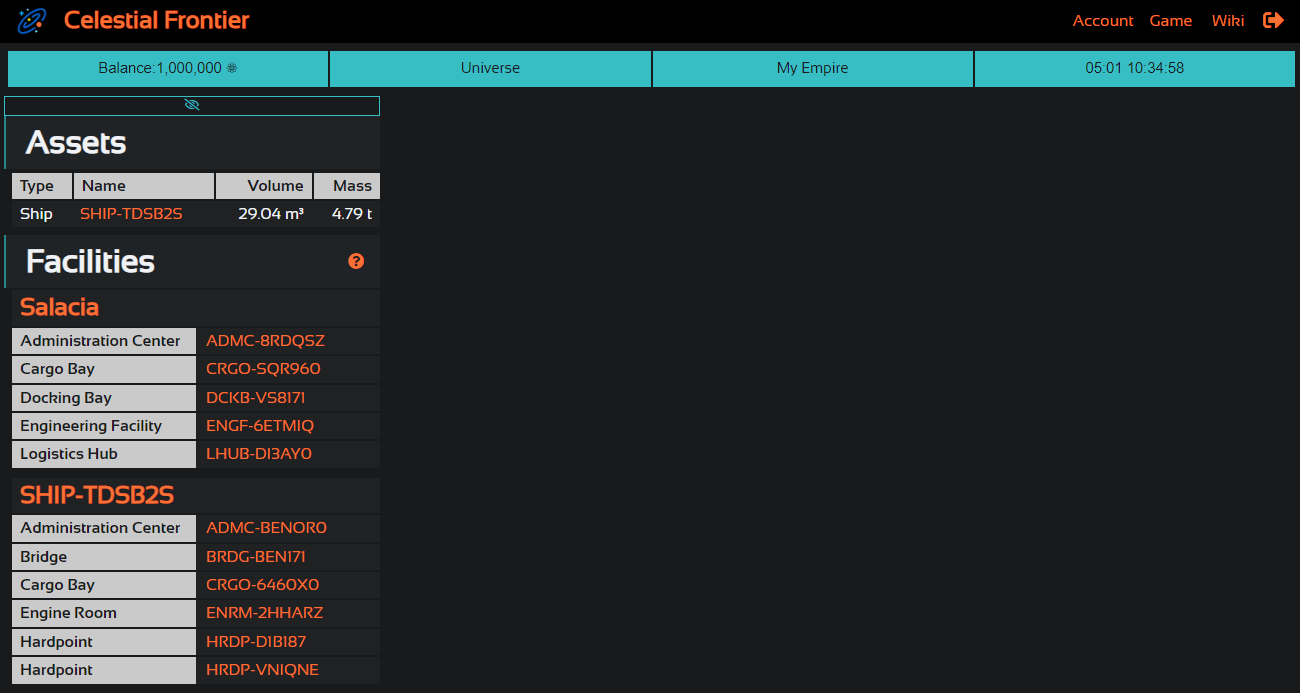
The Asset list displays all of the Ships and Stations that you own. The ship, SHIP-TDSB2S, has a volume of 29.04 cubic meters and a mass of 4.79 tons. Understanding volume and mass within Celestial Frontier is important, as these two mechanics play a part in every aspect of the game. For example, a 5000 cubic meter ship will not be able to dock in a 300 cubic meter station.
The ship name, SHIP-TDSB2S, is an automatically generated unique name following the pattern of NAME-UNIQUEID. Ships and facilities use autogenerated names by default, but can be customized within their respective interfaces.
¶ Salacia
The Salacia Station link will appear within the list of Facilities. Salacia Station is the Celestial Frontier New Player Station where all new players begin. Within this station, new players start with five facilities. These facilities serve as your starting foundation for your empire. Clicking the Salacia link within the game will bring you to the station overview. Clicking on any of the facilities listed below will take you to to the facility interface, allowing you to interact with the game.
- AMDC - Administration Center: Enables creation and management of new facilities within the Salacia Station
- CRGO - Cargo bay: Allows storage of items that you own
- DCKB - Docking Bay: A home for your ship
- ENGF - Engineering Facility: Industry, Research, & Development
- LHUB - Logistics Hub: Move ships, cargo, or other assets around
¶ Your Ship
New players begin with a small mining and damator collection Ship to get started. Like the Salacia station facilities, the ships will list all facilities within. The starting ship is a very short range ship that can be used to navigate within the Salacia Station region, mine ore, and collect Damator.
- AMDC - Administration Center: Enables creation and management of new facilities within the ship itself
- BRDG - Bridge: Enables navigation, allowing the ship to move within space
- CRGO - Cargo bay: Allows storage of items that you own
- ENRM - Engine Room: Houses ship engines used while navigating
- HRDP - Hardpoint: A resource collection facility equipped with a Damator Collector to collect Damator
- HRDP - Hardpoint: A resource collection facility equipped with Logistics Drones and Mining Drones to mine Ore
¶ Mining your first Ore
Mining ore from asteroids is one of the two primary methods of resource collection in Celestial Frontier. To complete this task, you will interact with your ship's Bridge to navigate to an asteroid, mine it, and then return back to your station to unload the cargo for processing.
This section of the tutorial will cover interacting with Facilities, Navigation, Job Management, and Logistics.
¶ Undocking your ship
To begin, find your ship's dashboard using the My Empire -> SHIP-?????? links in your Empire screen or navigate directly to the ship's bridge.
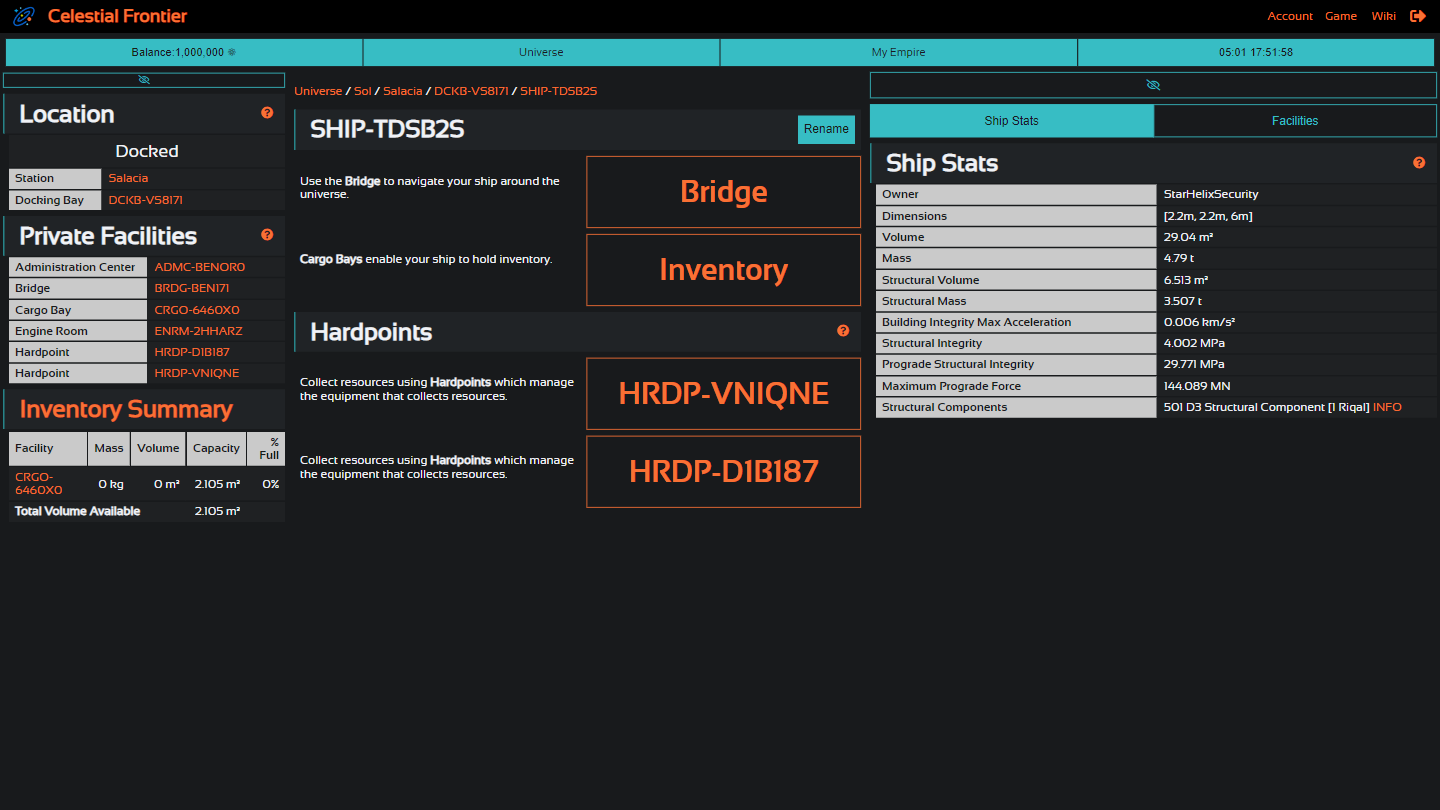
The ship dashboard displays a large amount of information about your ship. Click on the large Bridge button in the center of the screen to access navigation controls for this ship.
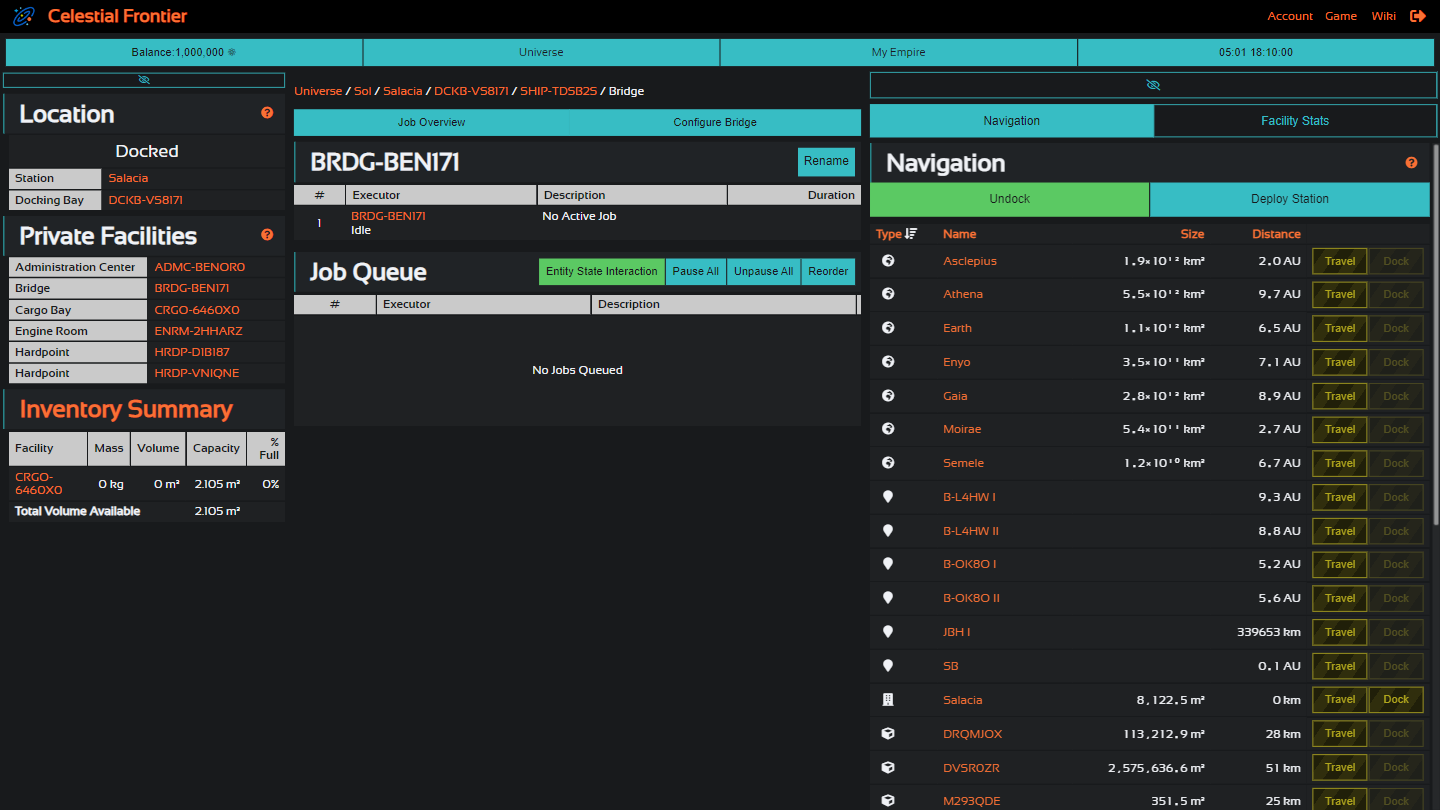
The bridge is the first facility we will interact with. Typically, the facility interface will show you Ship or Station information on the left panel, Job Management on the center panel, and Interactions on the right panel. A facility may be a Job Manager and/or a Job Executor. The Bridge is both a Job Manager and a Job Executor. When interacting with the game, almost all actions are done by queueing jobs within a facility. This facility currently has no active jobs and no jobs queued.
Let's queue a job!
Buttons on the right hand interaction panel are color coded to inform you what actions can be taken at this time. All Travel actions are not viable at this time because your ship is docked in Salacia Station. Travel actions are yellow with a striped background. The Undock action is green to indicate that you can do this action right now. The Deploy Station is blue which indicates that the action may be too complex or have additional parameters which cause it to be possible or impossible at this moment.
Click the green Undock button.
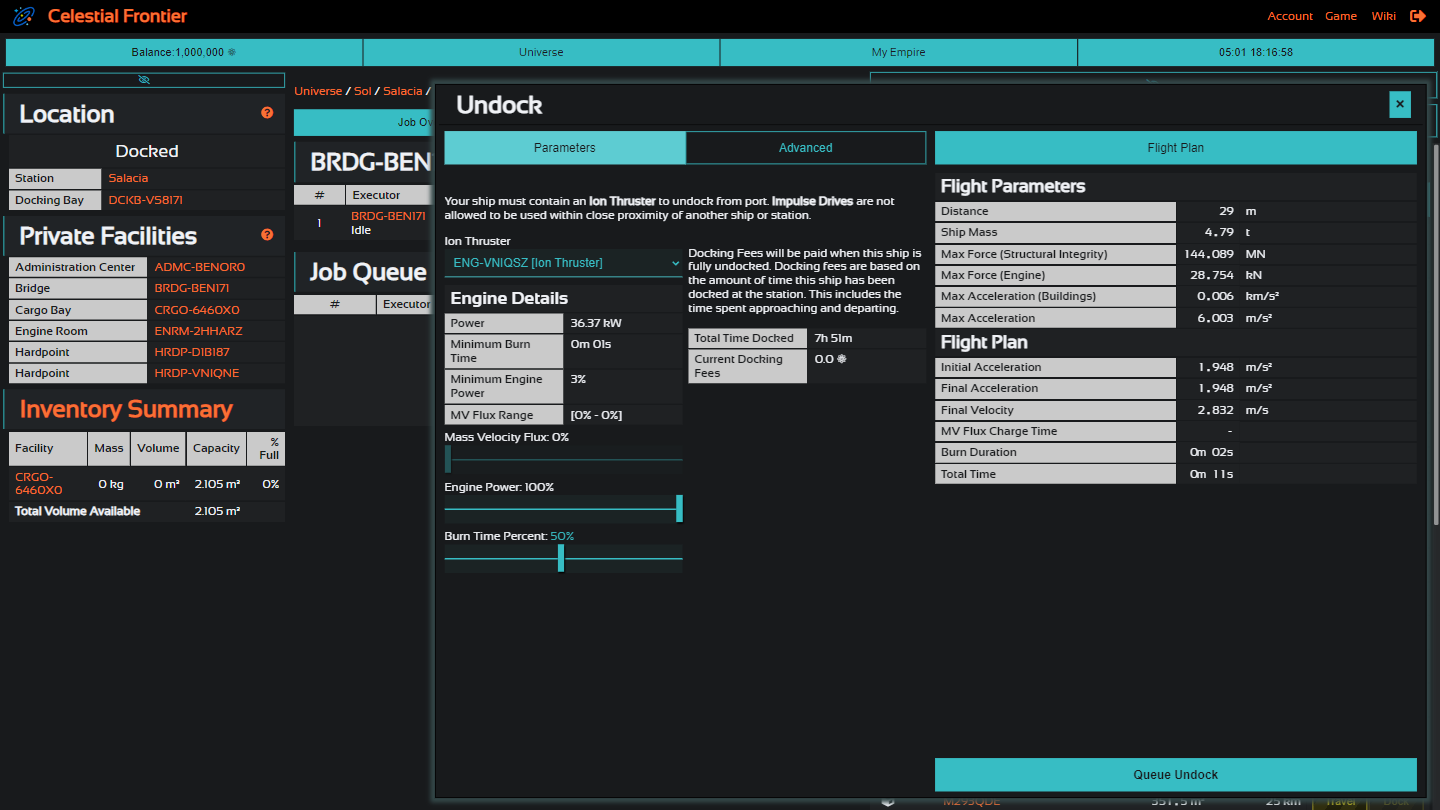
When clicking an action button, an action container appears on the screen with information and options about the job you intend to queue. The Undock action has configuration options on the left hand side with a summary of the flight plan on the right hand side. The default options for the undock action are almost always sufficient, so you can simply click the Queue Undock button on the bottom of the action container.
For more information about Queueing actions, check out the wiki page on Job Management
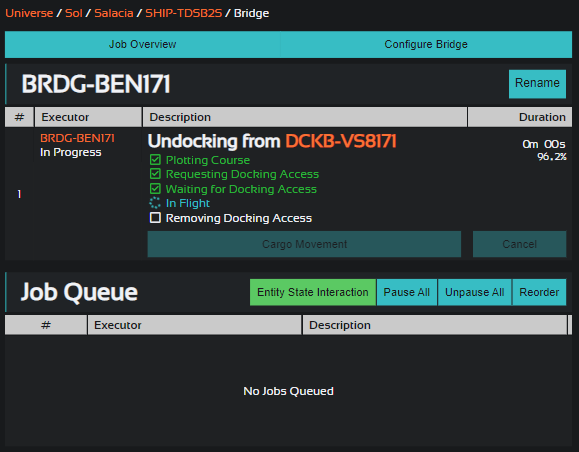
Congratulations, you've started your first voyage! Close the action container to see your job be picked up by the Bridge. Your ship will iterate through a few steps to undock and fly from the station to a safe distance of about 100 to 150 meters. The duration of the job and completion percentage is displayed alongside information about what the job is.
As already mentioned, most actions within the game are queued as actions rather than an immediate effect. This is by design so that players can queue up many actions that are executed in order while they are offline. The Celestial Frontier is always running, even while you are away.
¶ Navigating to an asteroid
Find your way back into the Bridge interface of your ship (Accessible from My Empire -> Ship-?????? -> Bridge). On the right hand side, you should now see a long table of different types of entites in space along side green Travel buttons. If the buttons are not green, check to make sure you've undocked by following the Undocking your ship section above
The Navigation panel of the bridge shows you all of the different ships, stations, resource nodes, points of interest, and planets that are in the vicinity. Each type of entity has a different icon. Resource Nodes are represented by a Cube and have a name like M41CBVZ or DVSROZR. Resource nodes always start with either an M (for Mineable) or D (for Damator) and have a 6 character alpha numeric unique identifier after.
Find a Mineable Rock nearby and click the Travel button in that row.
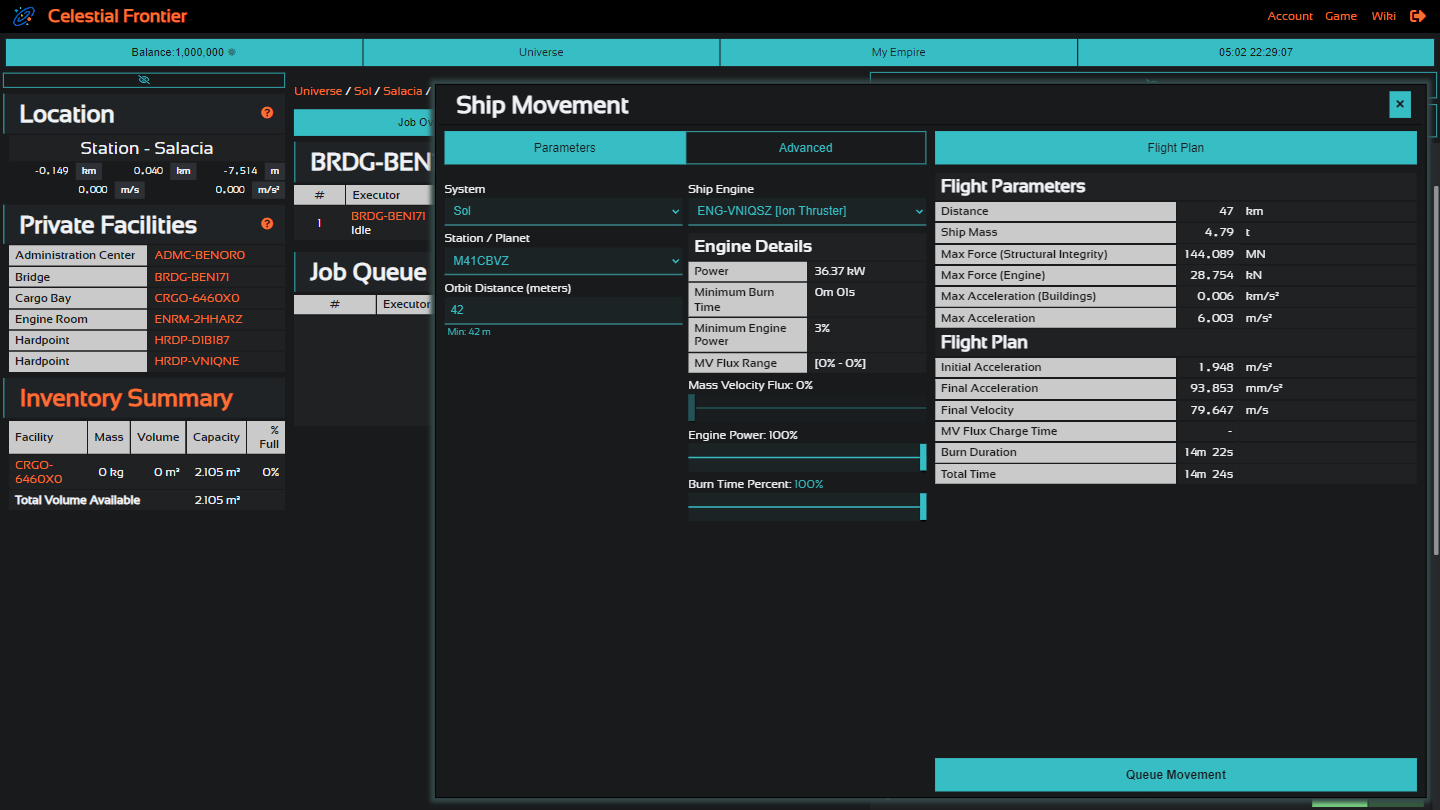
The action of ship movement is very similar to the action of undocking. Like many other actions, you are allowed to configure the action before queueing it. Ship movement is also an action that more often than not can be queued efficiently with the default options.

Your ship is now in motion! Close the action container and check out your bridge's job management interface. Let's take a few moments to identify what is happening.
- Notice that your ship has plotted a course and is likely now in Flight - if it is not, try traveling to another nearby resource node to get a feel for ship movement
- The duration of the job is counting down - this updates in real time, but the speed of the game may not match the tempo of time in the real world
- The Location information block on the left hand side of the screen should now be updating with your new position, speed, and acceleration
- A yellow Lock information block has now appeared on the left hand side indicating that your ship has a
Space Movement Lock - Ship locks are obtained by facilities to control resources - this lock will prevent you from mining until it comes to a complete stop
- The navigation panel on the right hand should be indicating a change in distance between your ship and the nearby entities as your ship flies through space
The resource nodes near the Salacia station are usually about 15 minutes away. Feel free to grab a coffee while the ship is in flight. When the ship arrives, we'll start mining.
¶ Mining
From the Ship Dashboard screen (Accessible from My Empire -> Ship-??????), click on one of the Hardpoint buttons in the center section. Your starting ship has two Hardpoint facilities. One hardpoint facility is built to mine ore. The other hardpoint facility is built to collect damator.
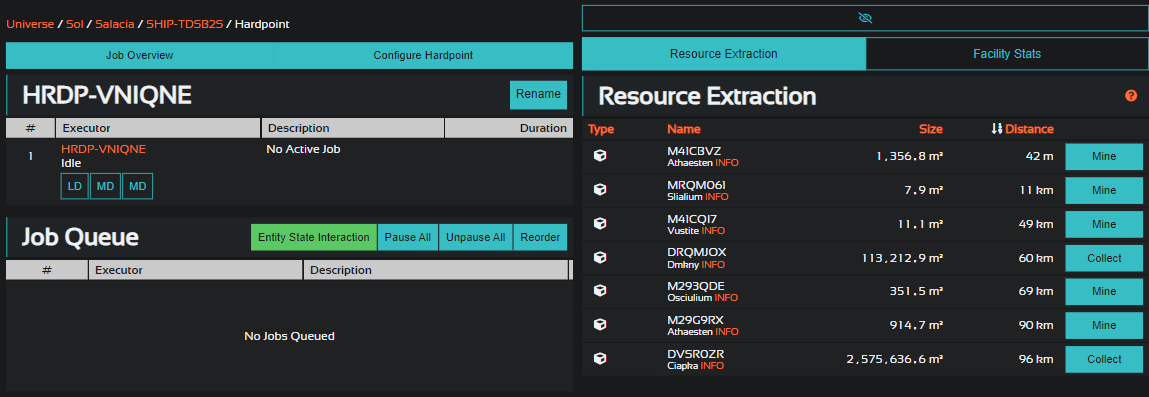
Within the hardpoint facility, the Job Management screen will show one Job Executor that has one or more small square buttons under the name. You will either see [LD] [MD] [MD] or you will see [DC]. These buttons represent Equipment that is installed within the facility. Clicking on the equipment will give you a detailed breakdown of the stats and composition of that equipment.
For now, we'll just want to find the hardpoint that has the Logistics Drone and the two Mining Drones ([LD] [MD] [MD]).
The Resource Extraction information on the right hand side will show you all of the resource nodes in the vicinity. Find the resource node that you traveled to (Try sorting by Distance, it should be within 50 meters), and click on the blue Mine button in that row.

Mining is a Work based Job. The left hand side of the action container will give you information about the rock that will be mined as well as the potential refineables of that rock should it be processed. In the above example, Athaesten is the rock we will get. When we process Athaesten, we will receive Riqal Ore and Stivan Ore, which can be turned into Forged Metal later on and used to construct a wide variety of components.
On the right hand side of the action container, we will see a breakdown of the differents steps involved. The above example indicates that mining a unit of Athaesten will take 57 minutes and 34 seconds for a 4.3kW Mining Drone to complete. When that is finished, a 950W Logistics Drone can bring it into the cargo hold in just 6 seconds.
The amount of time each task takes will vary depending on the equipment used and the resource node being mined. You can take a peak at the breakdown of it by clicking on the information button just above the work summary. Note that this breakdown is information about the tasks themselves, and is not an indication of how long the Job will take.
Set an appropriate Quantity (1 is fine for the tutorial) and queue the job.
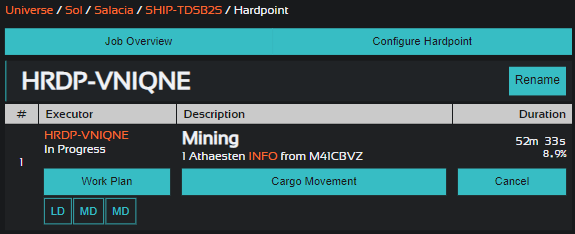
You should now see that the Hardpoint is Mining the resources from the resource node. You can view the Work Plan to get a better understanding of how Work breaks out into a Job's Duration. Each task is allocated to a piece of equipment to be completed. The system creates a Gantt chart as a visual aid to help players understand how their Equipment is being utilized. You can also view the Cargo Movement information screen to get an understanding of what items are being moved during this job and where they are being taken to. Lastly, you can cancel the mining operation - but you will receive no mined materials if you do so.
Grab another cup of coffee or check out some of the links in this wiki article while we wait for the mining operation to complete
¶ Returning to the station
When your mining operation is completed, head back to your ship dashboard (Accessible from My Empire -> Ship-??????). We can confirm that we have some ore by looking at our inventory. On the left hand side you will always have a quick reference to the inventory of the ship or station you are looking at. Click on the Inventory Summary link or the CRGO-?????? button to check out your inventory. Verify you have at least one unit of the mined material. If the only item listed in cargo is Mining Operation, that means that your mining is still in process and it has reserved space within your cargo bay for the ore.
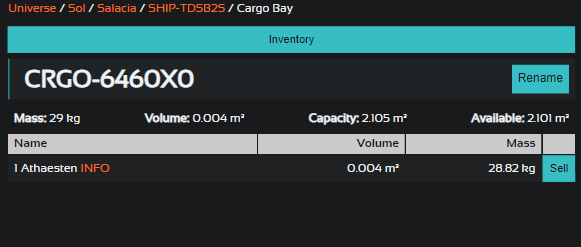
Once we verify we have the cargo, head back to the ship's Bridge and travel to Salacia Station.
Since we are waiting for the ship to travel, we can go ahead and queue up the Docking action now. Click on the green Docking button associated with Salacia Station. As with many of the other navigation actions, we can queue this efficiently using the default parameters.
**Click the Queue Dock button right away and it will add another job in the queue for the bridge to process.
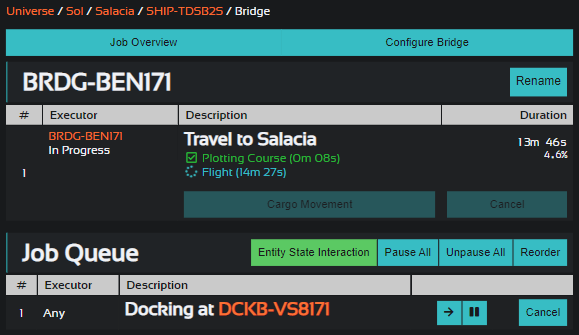
Before you know it, your ship will be docked inside of your personal docking bay at Salacia Station. When your ship arrives, head to the ship's cargo bay interface (Accessible from My Empire -> SHIP-?????? -> CRGO-??????).

Within the cargo bay interface, you should find a list of Connected Logistics Hubs. These are logistics hubs that are either on your ship, on the port (The ship or station you are docked at), or on a ship that is docked inside of your ship. Logistics Hubs can move items from a ship to another connected ship using Logistics Drones. All players start with a Logistics Hub on Salacia Station. You should be able to transfer cargo by clicking the green Export Cargo button. This will, as expected, bring up an action container to allow you to queue a logistics job.
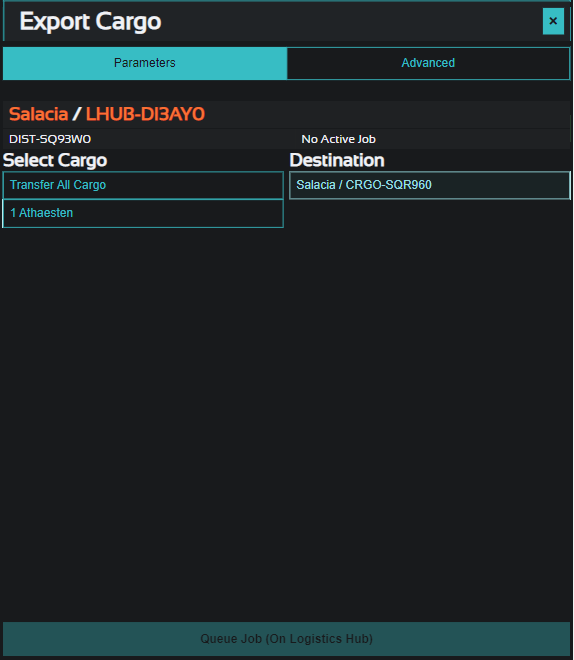
This action will queue a job on the logistics hub facility. Click on Transfer All Cargo under the Select Cargo list. Then click on a cargo bay in the Destination List. After selecting a set of items and a destination, you should now be able to queue the job.
Queue it!
Your logistics drones will haul these items over to your station very quickly.
Congratulations, you've successfully mined resources and brought them back to the station. Find your cargo bay on the Salacia Station. You should see some of the mined resources there, as well as a large stockpile of various components to get you started.
¶ Summary
This tutorial walks the player through some of the fundamental concepts of Celestial Frontier. You should have a better understanding of Facilities, Job Management, and Navigation. For more information about the game, dive into the wiki while your ship is mining.